Using the Meade LX 200
Introduction
The Meade LX200 is a 14inch Schmidt–Cassegrain telescope, this guide provides instructions on how to use the telescope with detail around setup, transport and the key functions.
The Meade takes about 15 minutes to setup if you’re practiced and have some help moving it.

Meade LX200
Power
The Meade is powered from an onboard battery that is on the base of the scope. There are 2 batteries, one is always left on charge and a fully charged one is left on the scope, they can be swapped at the end of the night to ensure one is always full for use. The charger is in the telescope room, connects with crocodile clips and is shown above.

Battery

Battery on charge
Transport
The Meade is mounted on a tripod that is wheelable, the wheels can be jacked up so that the scope rests on the tripod once it its in place.
Ideally 2 people should wheel it slowly together. It’s important to minimise jolts and bumps and to keep the scope as steady as possible.
Before moving you should check that the clutches for the Azimuth and Altitude are locked, this will prevent it from swinging around while it’s being moved. Also please ensure that the wooden rest that covers the control panel is left in place while the telescope is being moved. The telescope should be stored in this configuration.

The Meade in transport mode.
Positioning

Dropping Legs
The Meade should be positioned on a flat concrete pad outside the front of the observatory and to the side of the entrance way.
Try to find a position that is relatively out of the way of foot traffic to ensure it isn’t knocked over or bumped. Once in place face the control panel north and deploy the tripod legs.
The tripod legs only need to be dropped to the ground level and then tightened.
Please ensure they are tight before retracting the wheels. Once the legs are deployed you can wheel each wheel so that they clear the ground.

Wooden case removed.

Handle for raising wheels
Getting Ready to switch it on
Before you turn it on remove the wooden case from the back of the telescope. In order to do this you may need to loosen the altitude clutch a little. Once out place it inside until the scope is put away for the night, it should be replaced before the scope is moved back inside. Once the wooden box is off you can adjust the tightness of the altitude and the azimuth clutches and move the scope by hand when they are loosened to get it into a suitable position. Please note it’s best to keep these tightened (they don’t require much pressure to tighten) when you’re in operational mode and the tracking is on, this is because the motors won’t be able to drive the scope if they are loose and will spin with the Alt and Az disengaged.
It’s helpful to have a wide view eyepiece in place in the scope ahead of turning it on, once the time comes to auto align the scope it will be there for you to use. Remove the caps on the finderscope and the dust cap and place these inside. It’s best to wait until the scope is aligned to place the dew coat on. More on that below.

Altitude Clutch

Azimuth Clutch
Turning it on
When you turn the scope on it will boot up and display the status on the Autostar II control panel. The on switch and the panel are shown below.
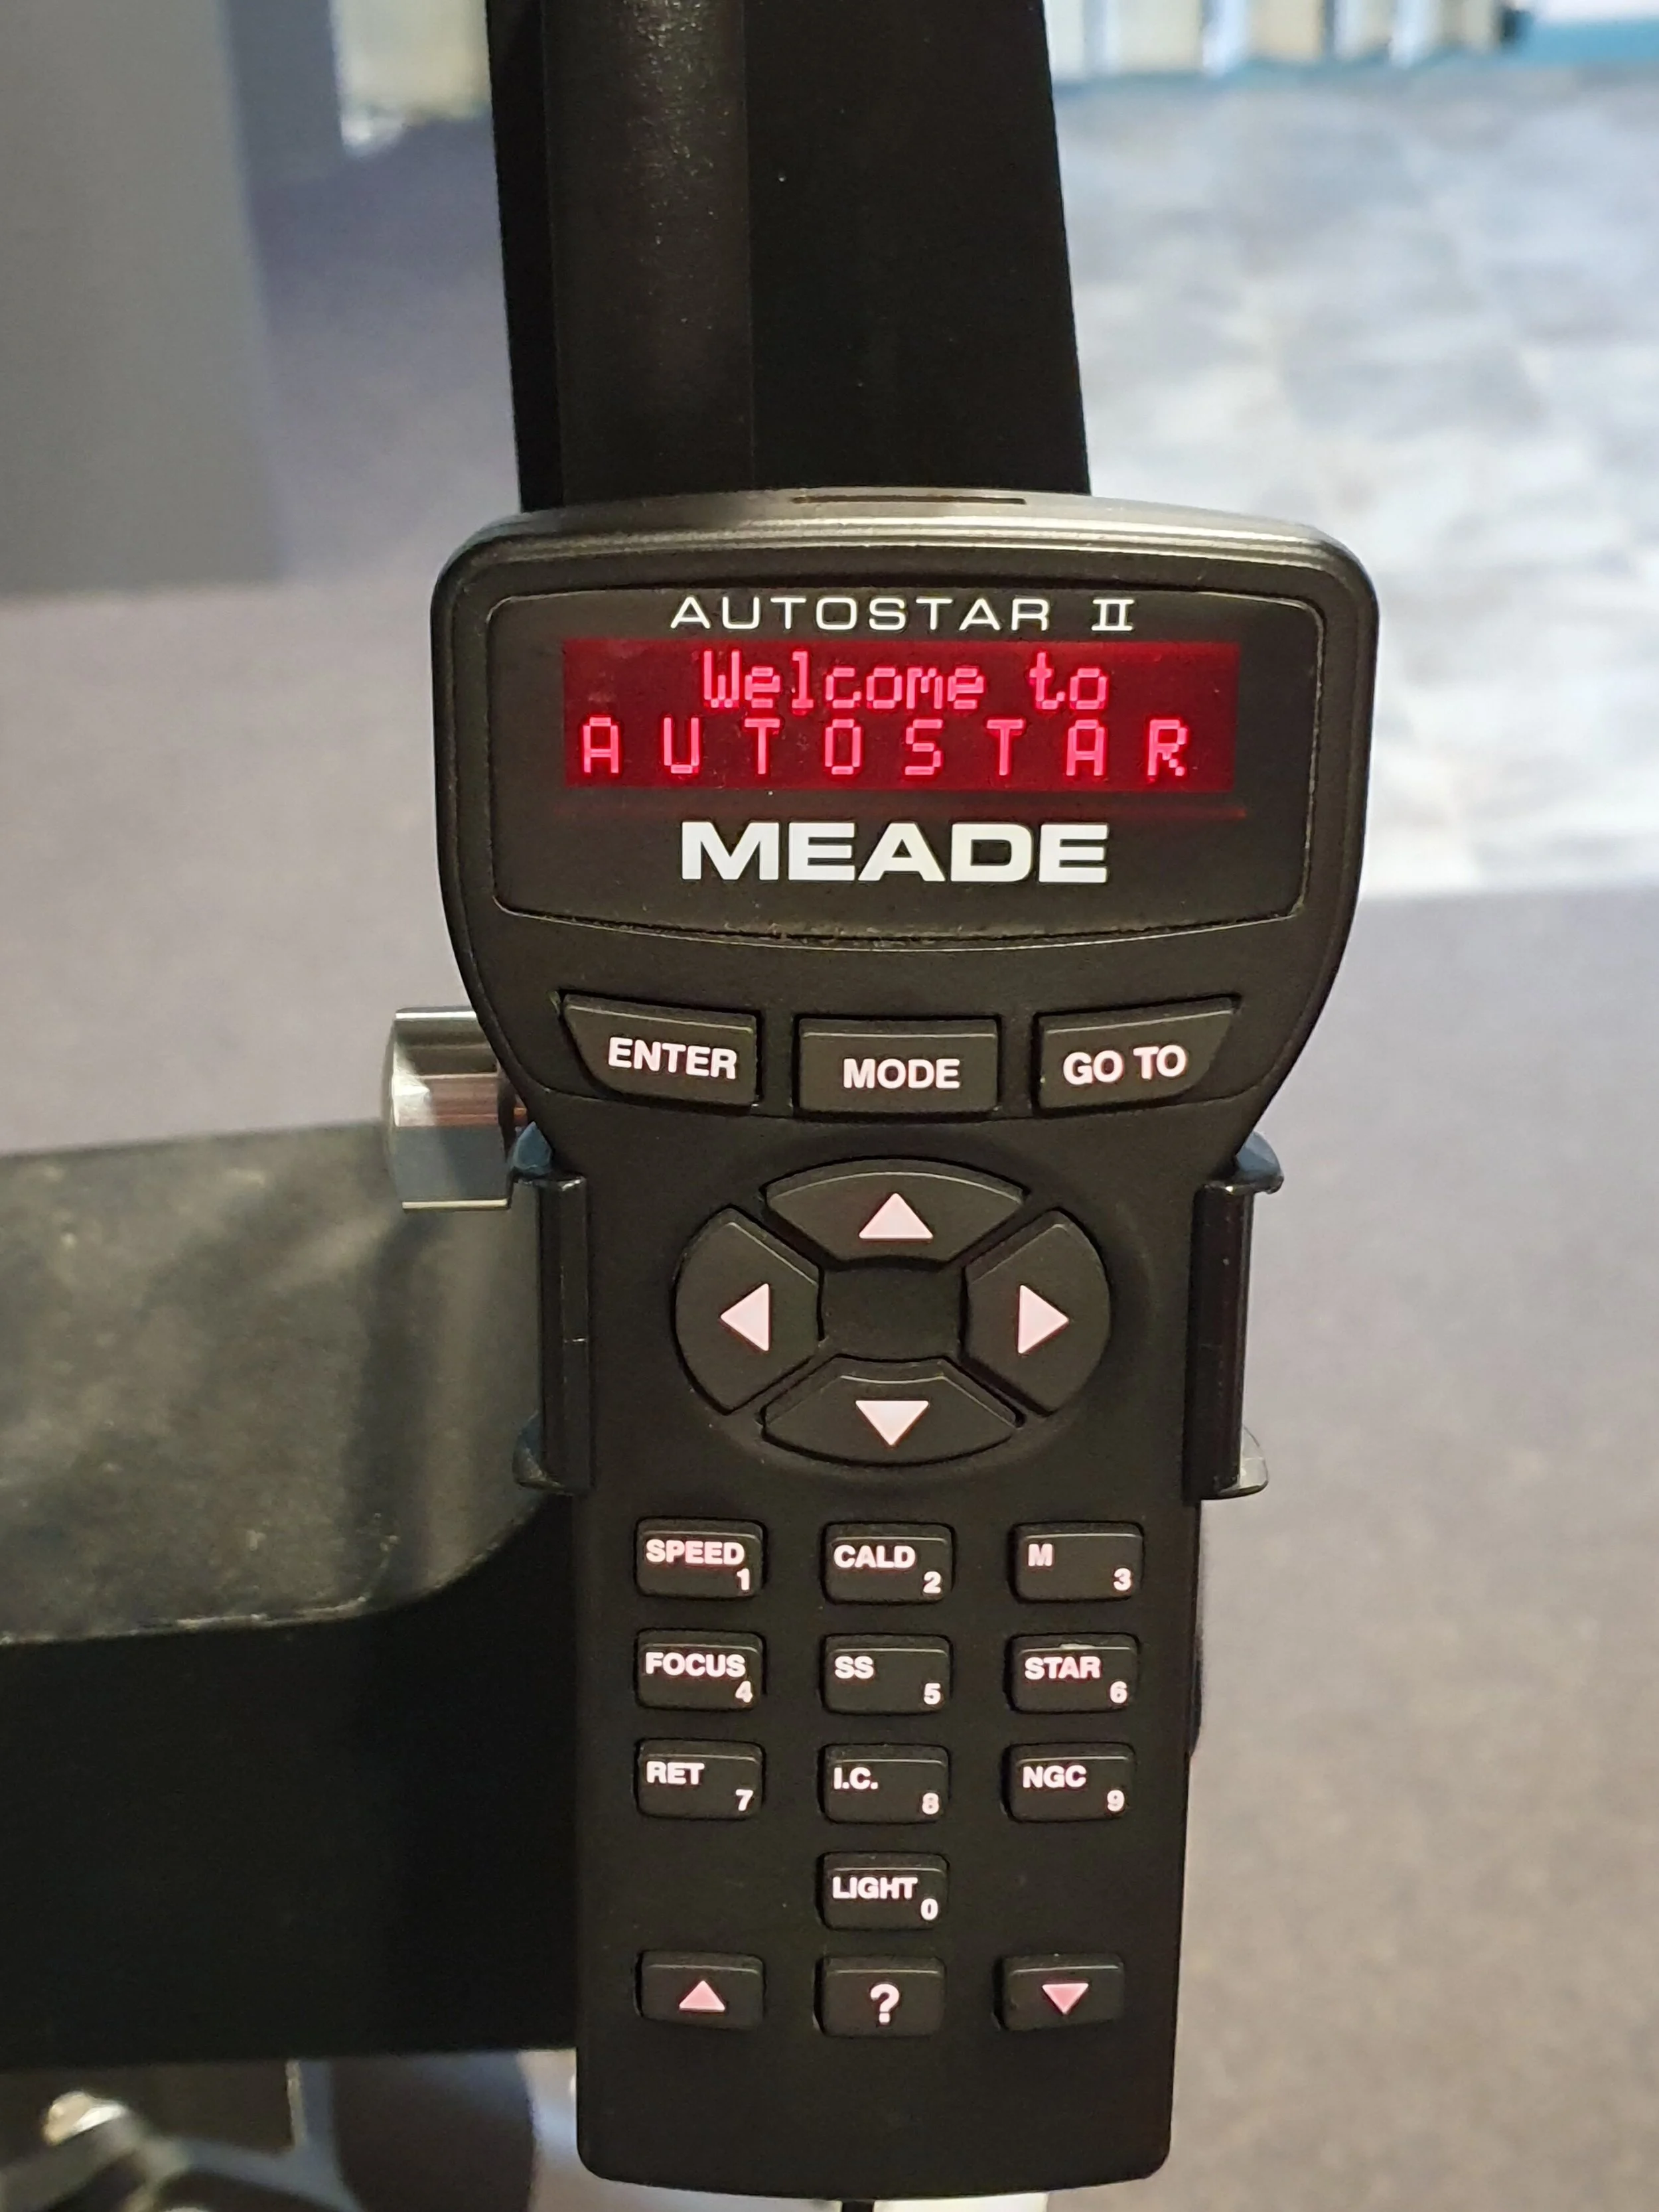
Autostar Control Panel

On Switch
Leveling and Alignment
The first automated setup process is leveling, during this phase the telescope will rotate and tilt to compensate for any tilt on the tripod from uneven ground. Once booted to initiate the process follow the steps below:
Once booted the Autostar panel will display:
Press 0 to Align or Mode for MenuPress Mode and the Autostar Panel will display:
Align: AutomaticPress Enter and the Autostar Panel will display:
Finding HomeThen
Auto Alignment: Finding Level
At this point the self leveling will begin, the video below shows what to expect to see:
Once this is over the Autostar II control panel will display:
Auto Alignment:Selecting StarIt will find a bright star in the sky and slew to point at where it thinks it is.
Auto Alignment: Slewing ....Once pointing at the star it will stop and display:
Center brightest star, push ENTER. At this point you should identify the star in the finder scope and then center it in the eyepiece then press enter.
Please note, the 2 arrows <— —> at the base of the autostar controller will allow you to select a star from a list of bright stars, this is often helpful as you can choose a star that is known rather than one the Meade has decided on. Once you’ve found the star you want then press enter and it will slew to that star so you can center it in the eyepiece.
Once centered and you’ve pressed enter it will slew to the second star, again you can choose the star you want using the arrows at the base of the hand controller.
You should pick 2 stars across the sky and not too close to each other and you should avoid any stars close to the zenith.
Once you’ve hit enter on the second star it will show calculating and then will be ready to go to.
Go to and Autostar
It will now show:
Select Item: ObjectYou can then scroll through the object classes:
Solar system
Star
Deep Sky
Constellation
Mode acts as a back key and also allows you to use the shortcut keys on the keypad for the object classes.
Once you’ve found the object you want to point to press GO TO and the telescope will slew.
There is lots of functionality in the Austostar control panel and it’s best to go through everything with another member who is familiar with it in person.
The four main arrows will allow you to adjust the position of the telescope.
Important notes
There are a few important things to remember when using the Meade.
While relatively stable it can be knocked over and you should take care to avoid foot traffic past it.
You should add the dew jacket once the telescope is set up this is shown below and can be strapped around the front half of the OTA. It’s stored in the telescope room.

Meade dew jacket
There is a mirror lock on the back of the telescope, this is shown below. It’s left unlocked always, this is because it it is locked and the coarse focus is used then it will damage the mirror. It should always remain unlocked and you should check it’s unlocked before you use the coarse focus. Please avoid locking it as it could be something the next user forgets to check.

Mirror Lock
The electric focus can be controlled from the autostar panel but sometimes you need to adjust the coarse focus to bring it into range. The electric focus is quite slow so you have to be patient. There is a focus button on the meade keypad and the focus can be controlled using the arrows in that mode.

Coarse Focus
When selecting eyepieces be wary of the one below, it’s extension means it’s liable to scratch the prism and it should ideally be avoided.

Avoid using this one with the Meade please
Any questions please don’t hesitate to email members@has.org.nz